SSH (Secure SHELL) is an open source and most trusted network protocol that is used to login into remote servers for execution of commands and programs. It is also used to transfer files from one computer to another computer over the network using secure copy (SCP) Protocol.
In this article we will show you how to setup password-less login on RHEL/CentOS 7.x/6.x/5.x and Fedora using ssh keys to connect to remote Linux servers without entering password. Using Password-less login with SSH keys will increase the trust between two Linux servers for easy file synchronization or transfer.
If you are dealing with number of Linux remote servers, then SSH Password-less login is one of the best way to automate tasks such as automatic backups with scripts, synchronization files using scp and remote command execution.
In this example we will setup SSH password-less automatic login from server 192.168.0.12 as user tecmint to 192.168.0.11 with user sheena.
Step 1: Create Authentication SSH-Kegen Keys on – (192.168.0.12)
First login into server 192.168.0.12 with user tecmint and generate a pair of public keys using following command.
[tecmint@tecmint.com ~]$ ssh-keygen -t rsa
Generating public/private rsa key pair.
Enter file in which to save the key (/home/tecmint/.ssh/id_rsa): [Press enter key]
Created directory '/home/tecmint/.ssh'.
Enter passphrase (empty for no passphrase): [Press enter key]
Enter same passphrase again: [Press enter key]
Your identification has been saved in /home/tecmint/.ssh/id_rsa.
Your public key has been saved in /home/tecmint/.ssh/id_rsa.pub.
The key fingerprint is:
5f:ad:40:00:8a:d1:9b:99:b3:b0:f8:08:99:c3:ed:d3 tecmint@tecmint.com
The key's randomart image is:
+--[ RSA 2048]----+
|        ..oooE.++|
|         o. o.o  |
|          ..   . |
|         o  . . o|
|        S .  . + |
|       . .    . o|
|      . o o    ..|
|       + +       |
|        +.       |
+-----------------+
Create SSH RSA Key
Step 2: Create .ssh Directory on – 192.168.0.11
Use SSH from server 192.168.0.12 to connect server 192.168.0.11 using sheena as user and create .sshdirectory under it, using following command.
[tecmint@tecmint ~]$ ssh sheena@192.168.0.11 mkdir -p .ssh
The authenticity of host '192.168.0.11 (192.168.0.11)' can't be established.
RSA key fingerprint is 45:0e:28:11:d6:81:62:16:04:3f:db:38:02:la:22:4e.
Are you sure you want to continue connecting (yes/no)? yes
Warning: Permanently added '192.168.0.11' (ECDSA) to the list of known hosts.
sheena@192.168.0.11's password: [Enter Your Password Here]
Create SSH Directory Under User Home
Step 3: Upload Generated Public Keys to – 192.168.0.11
Use SSH from server 192.168.0.12 and upload new generated public key (id_rsa.pub) on server 192.168.0.11under sheena‘s .ssh directory as a file name authorized_keys.
Host websites, control panels and device APIs at <yourdevice>.dataplicity.io
Dataplicity Wormhole allows you to host a website from your Raspberry Pi, regardless of where it is installed, at a specific address (https://<yourdevice>.dataplicity.io/). Port forwarding, firewall exceptions and Dynamic DNS are no longer required. See how it works here.
Pre-requisites
For Wormhole you will need:
A Raspberry Pi with a working connection to the internet
If you have been going through other tutorials for wormhole you might have an application or a service already running on port 80. Make sure that nothing is running on port 80 prior to following the instructions in this article.
Install a web server on your Pi
If you already have a web service running on your Pi which is listening on localhost port 80, you can skip this section. Otherwise, you'll need to install one. In this example we're going to install a very popular web server called NGINX (pronounced "Engine-X" - any other web server will do).
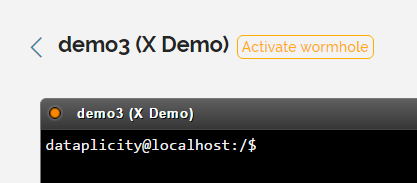
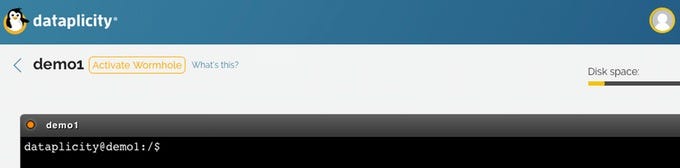
To enable Wormhole, log in to your Dataplicity account. You'll want to do this on a laptop. Open up the Device page for your Pi.
You should see a button next to the device name that says "Activate Wormhole":
Click "Activate Wormhole".
If you do not see the "Activate Wormhole" button, check to ensure that you have your Pi connected to the internet and you've correctly updated the Dataplicity client to a recent version. If you have issues, you may re-try the Dataplicity agent installation.
When pressed, the button will be replaced with a direct link to your device, like so:
The green text is a clickable link to the web site on your Pi
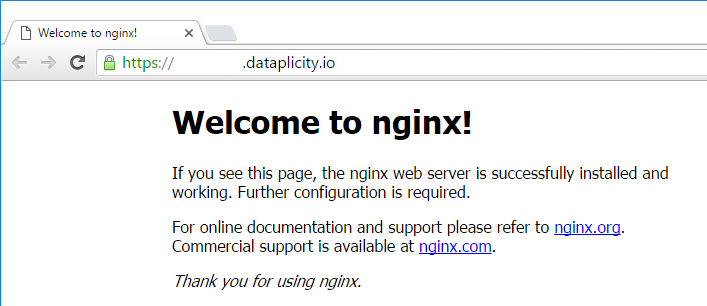
Click the link (or type it into your browser). You should see your device website.
The website above is actually running on your Pi. The files for it, and the code for it, are all in the Pi. And if you remove your Pi from your home network and take it to a hackathon, the website link is still the same!
Awesome :-)
Security considerations
When you switch on Wormhole you are placing the web service hosted on your Pi directly on the wider internet. That's actually the point, but what it means is that you need to take special care in what you put online.
In this case, NGINX is running on port 80 directly from your Pi. Wormhole listens only on localhost, so you don't need to have port 80 open directly from your Pi to the wider world - even though this is not inherently insecure.
Just to avoid confusion it's sensible to close the device port by installing a firewall. Depending on your application you may also wish to enable HTTP basic-authentication from the NGINX configuration, and require a password for website access.
We've put together some basic tips for Securing Wormhole - well worth a read
Rather than using the Raspberry Pi camera module, you can use a standard USB webcam to take pictures and video on the Raspberry Pi.
Note that the quality and configurability of the camera module is highly superior to a standard USB webcam.
Install fswebcam
First, install the fswebcam package:
sudo apt-get install fswebcam
Basic usage
Enter the command fswebcam followed by a filename and a picture will be taken using the webcam, and saved to the filename specified:
fswebcam image.jpg
This command will show the following information:
--- Opening /dev/video0...
Trying source module v4l2...
/dev/video0 opened.
No input was specified, using the first.
Adjusting resolution from 384x288 to 352x288.
--- Capturing frame...
Corrupt JPEG data: 2 extraneous bytes before marker 0xd4
Captured frame in 0.00 seconds.
--- Processing captured image...
Writing JPEG image to 'image.jpg'.
Note the small default resolution used, and the presence of a banner showing the timestamp.
SPECIFY RESOLUTION
The webcam used in this example has a resolution of 1280 x 720 so to specify the resolution I want the image to be taken at, use the -r flag:
fswebcam -r 1280x720 image2.jpg
This command will show the following information:
--- Opening /dev/video0...
Trying source module v4l2...
/dev/video0 opened.
No input was specified, using the first.
--- Capturing frame...
Corrupt JPEG data: 1 extraneous bytes before marker 0xd5
Captured frame in 0.00 seconds.
--- Processing captured image...
Writing JPEG image to 'image2.jpg'.
Picture now taken at the full resolution of the webcam, with the banner present.
SPECIFY NO BANNER
Now add the --no-banner flag:
fswebcam -r 1280x720 --no-banner image3.jpg
which shows the following information:
--- Opening /dev/video0...
Trying source module v4l2...
/dev/video0 opened.
No input was specified, using the first.
--- Capturing frame...
Corrupt JPEG data: 2 extraneous bytes before marker 0xd6
Captured frame in 0.00 seconds.
--- Processing captured image...
Disabling banner.
Writing JPEG image to 'image3.jpg'.
Now the picture is taken at full resolution with no banner.
Bad Pictures
You may experience poor quality pictures with a USB webcam, such as this accidentally artistic piece:
Some webcams are more reliable than others, but this sort of issue may occur with poor quality webcams. If the problem persists, ensure your system is up to date. Also try other webcams, but you'll get the best performance from the Raspberry Pi camera module.
Bash script
You can write a Bash script which takes a picture with the webcam. The script below saves the images in the /home/pi/webcam directory, so create the webcam subdirectory first with:
mkdir webcam
To create a script, open up your editor of choice and write the following example code:
This script will take a picture and name the file with a timestamp. Say we saved it as webcam.sh, we would first make the file executable:
chmod +x webcam.sh
Then run with:
./webcam.sh
Which would run the commands in the file and give the usual output:
--- Opening /dev/video0...
Trying source module v4l2...
/dev/video0 opened.
No input was specified, using the first.
--- Capturing frame...
Corrupt JPEG data: 2 extraneous bytes before marker 0xd6
Captured frame in 0.00 seconds.
--- Processing captured image...
Disabling banner.
Writing JPEG image to '/home/pi/webcam/2013-06-07_2338.jpg'.
Time-lapse using cron
You can use cron to schedule taking a picture at a given interval, such as every minute to capture a time-lapse.
First open the cron table for editing:
crontab -e
This will either ask which editor you would like to use, or open in your default editor. Once you have the file open in an editor, add the following line to schedule taking a picture every minute (referring to the Bash script from above):
*****/home/pi/webcam.sh 2>&1
Save and exit and you should see the message:
crontab: installing new crontab
Ensure your script does not save each picture taken with the same filename. This will overwrite the picture each time.
Other Useful tools
Other tools are available that may come in handy when using the camera or a webcam:
Stream live videos from Raspberry Pi on the internet
By the end of this tutorial you’ll have a live video stream that can be accessed from anywhere.
OVERVIEW
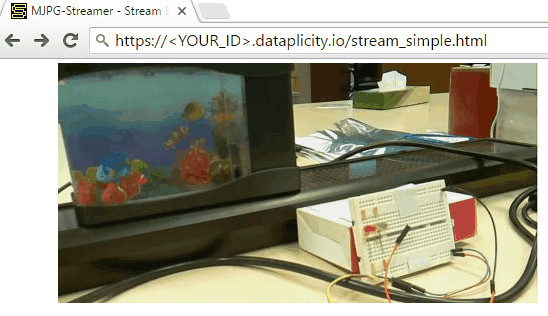
In this article we’ll show how to stream live videos from your Pi to a web browser. The technology that we’ve used to achieve that is an MJPG-streamer application and a Raspberry Pi camera. The end result is shown below.
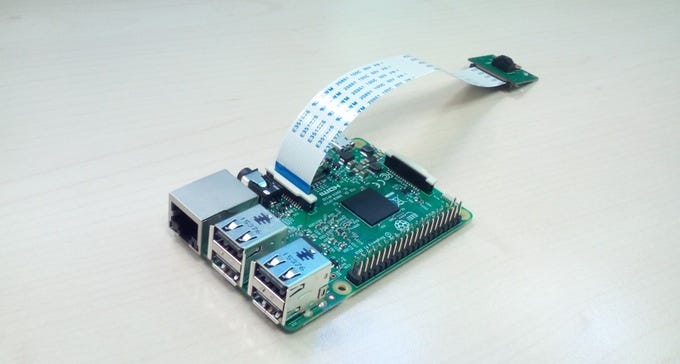
The first thing to do is to set up the camera and make sure it’s working. Connect the camera to your Pi as show below with the blue marking on the camera tape connector facing the ethernet port.
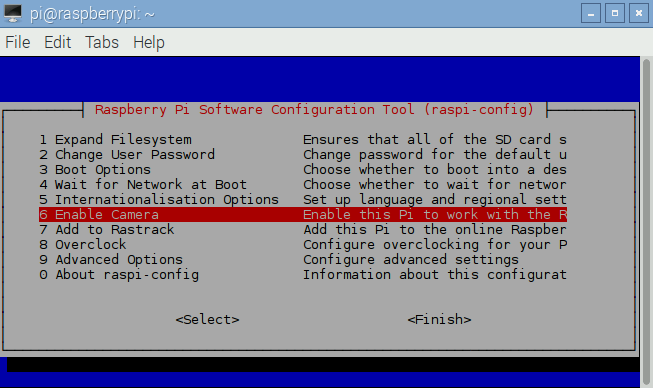
After the camera is physically connected you have to enable it. This is done using the native Raspberry Pi configuration tool — raspi-config . Run the tool using the command below.
sudo raspi-config
A menu with different configuration options will appear. Navigate to Enable camera and press enter.
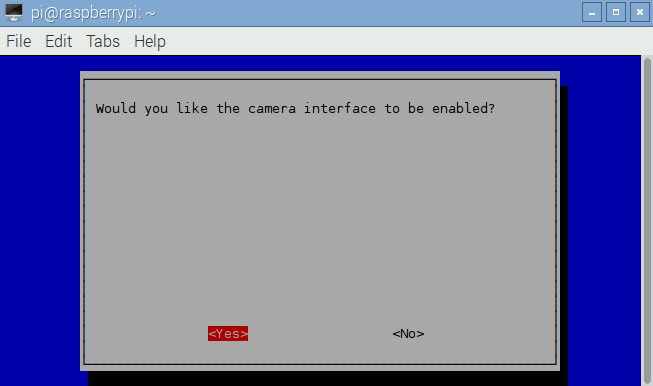
Select Yes option and press enter.
From the main menu exit raspi-config by pressing the right arrow twice to navigate to the "<Finish>" option and press enter to exit. You will be prompted to reboot your Raspberry Pi for changes to take effect - select Yes.
TEST THE CAMERA
To test that the camera is functioning correctly we’ll take one image and save it to /home/pi using the command below.
raspistill -o /home/pi/image.jpg
When the command is executed you will see a camera preview appear on your display. The preview will stay on for few seconds and then an image will be taken.
RASPBERRY PI CAMERA AS USB VIDEO DEVICE
The Raspberry Pi camera can appear in /dev as a standard USB video device (required by MJPG) if we load the “Video for Linux 2” (V4L2) module for the corresponding hardware (BCM2835). We do this as follows:
sudo modprobe bcm2835-v4l2
If you’re getting an error when trying to run the command above, be aware that “v4l2” is actually the lowercase version of “- V 4 L 2” instead of “- V 4 1 2”. The ‘l’ is the letter L, not the number 1.
Upon successful execution of this command you should see Video0 device file inside /dev directory. To verify, run the command below.
ls /dev | grep vid
UPDATE YOUR SYSTEM SOFTWARE
Prior to proceeding with the steps below please first make sure that the latest updates are installed on your Pi. To update your Pi run the two commands below.
The MJPG-streamer application doesn’t come in a package form that we can install using sudo apt-get install command. Instead, what we have to do is to download and compile it from source code.
Source code usually comes in the form of a “tarball” i.e. multiple files packed together into an archive using the tar utility and then compressed using gzip utility to reduce the size of the archive.
Download MJPG-streamer tarball using the command below.
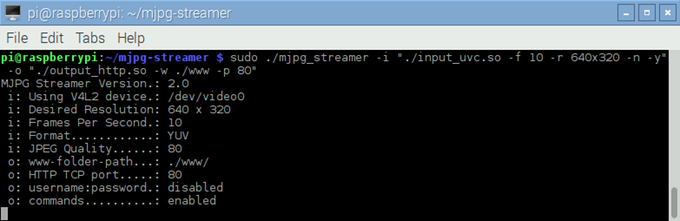
If you see an output similar to the one below it means that the server is running correctly
ENABLE WORMHOLE
If you haven’t already done so, log in to your Dataplicity account and go to the device (e.g. the Pi) you want to link to. At the top of the page will be a link to ‘Activate Wormhole’.
Press it and enable Wormhole. The link will contain your device ID.
ACCESS YOUR CAMERA VIDEO STREAM VIA DATAPLICITY WORMHOLE
To see our video stream embedded using HTML we’ll go to the address below (remember to replace <YOUR_ID> with your device Wormhole URL from your Dataplicity account).
Below is an example of the video captured from the above URL.
TROUBLESHOOTING THE VIDEO STREAM
You might find that sometimes your stream could crash, jitter or suffer high lag. This can happen if your Pi and/or your internet connection cannot sustain the video stream at the framerate and resolution you have selected.
> Breakdown of MJPG-streamer run command:
The MJPG-streamer itself contains couple of options. In the above command that we used to run the server we’ve set two options:
“-i” is an option that takes path to an input plugin and the parameters to it.
“-o” is an option that takes path to an output plugin and the parameters to it.
The parameters that we’ve used for the input plugin are:
“-f” framerate — this sets how many frames are captured per second.
“-r” resolution — this sets the size for the image we’re capturing
“-n” This option suppresses the errors that show up when the command is ran. These errors show because our camera can’t be physically controlled. The errors have no impact on the streaming functionality but it’s nice to run the server without seeing them.
“-y” Specifies YUV format for the output image.
The parameters that output option takes that we’re using are:
“-w” path to folder where the website content is served from.
“-p” port on which the website and stream is served on.
Accordingly, as we ran it above, mjpg_streamer was operating at a resolution of 640x320 and a framerate of 10 images per second. Here is the command to run it at a reduced 5 frames per second: