Showing posts with label Current Work. Show all posts

Friday, 21 August 2020

How to install google-chrome in redhat without redhat subscription

Install google-chrome in redhat 


Download the .rpm file of chrome

https://www.google.com/chrome/thank-you.html?installdataindex=empty&statcb=0&defaultbrowser=0&brand=CHBD

Execute the following commands 


 wget http://mirror.centos.org/centos/7/os/x86_64/Packages/liberation-fonts-1.07.2-16.el7.noarch.rpm

wget http://mirror.centos.org/centos/7/os/x86_64/Packages/liberation-fonts-1.07.2-16.el7.noarch.rpm

wget http://mirror.centos.org/altarch/7/os/aarch64/Packages/liberation-mono-fonts-1.07.2-16.el7.noarch.rpm

wget http://mirror.centos.org/centos/7/os/x86_64/Packages/liberation-fonts-common-1.07.2-16.el7.noarch.rpm

wget http://mirror.centos.org/centos/7/os/x86_64/Packages/liberation-mono-fonts-1.07.2-16.el7.noarch.rpm

wget http://mirror.centos.org/centos/7/os/x86_64/Packages/liberation-narrow-fonts-1.07.2-16.el7.noarch.rpm

wget http://mirror.centos.org/centos/7/os/x86_64/Packages/liberation-sans-fonts-1.07.2-16.el7.noarch.rpm

wget http://mirror.centos.org/centos/7/os/x86_64/Packages/liberation-serif-fonts-1.07.2-16.el7.noarch.rpm

yum install liberation* google-chrome*

Monday, 2 April 2018

How to Play Audio on the Raspberry PI

PLAYING AUDIO ON THE RASPBERRY PI

To play an MP3 file, navigate to the location of the .mp3 file in the terminal using cd and then type the following command:
omxplayer example.mp3
This will play the audio file example.mp3 through either your monitor's built-in speakers or your headphones, connected via the headphone jack.
If you need an example file you can download one from here using the following command:
wget http://rpf.io/lamp3 -O example.mp3 --no-check-certificate
If you cannot hear anything, make sure your headphones or speakers are connected correctly. Note that omxplayer doesn't use ALSA and so ignores the audio configuration set by raspi-config or amixer.
If omxplayer's auto-detection of the correct audio output device fails, you can force output over HDMI with:
omxplayer -o hdmi example.mp3
Alternatively, you can force output over the headphone jack with:
omxplayer -o local example.mp3
You can even force output over both the headphone jack and HDMI with:
omxplayer -o both example.mp3

Python Script execute commands in Terminal

import os
os.system("ls -l")


import subprocess
test = subprocess.Popen(["ping","-W","2","-c", "1", "192.168.1.70"], stdout=subprocess.PIPE)

I prefer usage of subprocess module:
from subprocess import call
call(["ls", "-l"])
Reason is that if you want to pass some variable in the script this gives very easy way for example take the following part of the code
abc = a.c
call(["vim", abc])

Sunday, 12 November 2017

#Error : TensorFlow not found in pip

Hello Everyone ,
If you are not getting any error while starting new things in doing some setup then it means that you might have done something wrong.

Here, I was getting error while installing tensorflow in my system and i had been searching for a very long ago and finally i found the solution of #GURU of developer.

python3 -m pip install --upgrade https://storage.googleapis.com/tensorflow/mac/cpu/tensorflow-0.12.0-py3-none-any.whl
or try 

pip install --upgrade https://storage.googleapis.com/tensorflow/mac/cpu/tensorflow-0.12.0-py3-none-any.whl

Reference Link:
https://stackoverflow.com/questions/38896424/tensorflow-not-found-in-pip

Saturday, 18 February 2017

How to watch Temperature of CPU cores in Ubuntu ?


How to install sensors library to get temperature of CPU-Cores ?


Install lm-sensors
 
Install lm-sensors
sudo apt-get install lm-sensors 

After installation type the following in terminal

sudo sensors-detect

You may also need to run

sudo service kmod start
It will ask you few questions. Answer Yes for all of them. Finally to get your CPU temperature type sensors in your terminal.
sensors
Output:
karthick@Ubuntu-desktop:~$ sensors
coretemp-isa-0000
Adapter: ISA adapter
Core 0:      +41.0°C  (high = +78.0°C, crit = +100.0°C)  

coretemp-isa-0001
Adapter: ISA adapter
Core 1:      +41.0°C  (high = +78.0°C, crit = +100.0°C)  

w83627dhg-isa-0290
Adapter: ISA adapter
Vcore:       +1.10 V  (min =  +0.00 V, max =  +1.74 V)   
in1:         +1.60 V  (min =  +1.68 V, max =  +1.44 V)   ALARM
AVCC:        +3.30 V  (min =  +2.98 V, max =  +3.63 V)   
VCC:         +3.28 V  (min =  +2.98 V, max =  +3.63 V)   
in4:         +1.85 V  (min =  +1.66 V, max =  +1.11 V)   ALARM
in5:         +1.26 V  (min =  +1.72 V, max =  +0.43 V)   ALARM
in6:         +0.09 V  (min =  +1.75 V, max =  +0.62 V)   ALARM
3VSB:        +3.30 V  (min =  +2.98 V, max =  +3.63 V)   
Vbat:        +3.18 V  (min =  +2.70 V, max =  +3.30 V)   
fan1:          0 RPM  (min = 10546 RPM, div = 128)  ALARM
fan2:        892 RPM  (min = 2136 RPM, div = 8)  ALARM
fan3:          0 RPM  (min = 10546 RPM, div = 128)  ALARM
fan4:          0 RPM  (min = 10546 RPM, div = 128)  ALARM
fan5:          0 RPM  (min = 10546 RPM, div = 128)  ALARM
temp1:       +36.0°C  (high = +63.0°C, hyst = +55.0°C)  sensor = diode
temp2:       +39.5°C  (high = +80.0°C, hyst = +75.0°C)  sensor = diode
temp3:      +119.0°C  (high = +80.0°C, hyst = +75.0°C)  ALARM  sensor = thermistor
cpu0_vid:   +2.050 V

Monday, 13 February 2017

Sending And Receiving Using MQTT


Sending and Receiving Messages with MQTT


Intro

MQTT (Message Queue Telemetry Transport) is an ISO standard (ISO/IEC PRF 20922) publish-subscribe based “light weight” messaging protocol for use on top of the TCP/IP protocol. It is designed for connections with remote locations where a “small code footprint” is required or the network bandwidth is limited.
It’s very easy to use the MQTT protocol to exchange small messages between several devices.

Basics

  • A message has a topic and a payload, like the subject and the content of an e-mail.
  • The Publisher sends a message to the network.
  • The Subscriber listens for messages with a particular topic.
  • The Broker is responsible for coordinating the communication between publishers and subscribers. It can also store messages while subscribers are offline (a feature not used in this tutorial).

Requirements

We need a broker that is always available. Just one for the whole network. It can be a PC, a Raspberry Pi or even an EV3. If it is a Debian-based linux system we can use mosquitto
sudo apt-get install mosquitto
This installs and also starts the mosquitto daemon. You can check if it is working by using the systemctl command:

robot@ev3dev:~# systemctl status mosquitto
 
 
 ● mosquitto.service - LSB: mosquitto MQTT v3.1 message broker
   Loaded: loaded (/etc/init.d/mosquitto)
   Active: active (running) since Wed 2016-05-11 07:40:51 WEST; 7min ago
   CGroup: /system.slice/mosquitto.service
           └─685 /usr/sbin/mosquitto -c /etc/mosquitto/mosquitto.conf
Now we are able to send and receive messages through the broker (by default mosquitto uses port 1883).
This tutorial uses python scripts so we need to install the python library paho-mqtt. You need ‘pip3’ to install this module, so if you have not already done so, you will need to install pip3:

sudo apt-get install python3-pip
  
OR
 
 sudo apt-get install python-pip
 
Now you can install paho-mqtt:

sudo pip3 install paho-mqtt
 
 OR
 
 sudo pip install paho-mqtt
 
All scripts were tested successully on a EV3 running the latest ev3dev version (as of 21 Dec 2016) and also on a Raspberry Pi 3 with a BrickPi running the same ev3dev version and a laptop running Ubuntu 16.04.

Publisher example

A very simple script to publish a message:

#!/usr/bin/env python3

import paho.mqtt.client as mqtt

# This is the Publisher

client = mqtt.Client()
client.connect("localhost",1883,60)
client.publish("topic/test", "Hello world!");
client.disconnect();


Note: if using an external broker (i.e. the mosquitto deamon is not running in the EV3 that publishes messages) replace localhost with the IP address of the device that hosts the broker.

Subscriber example

Any MQTT client that is connected to our broker and has subscribed for “topic/test” will receive a MQTT message with “Hello world!” as the payload. We can test it with a mobile phone (there are several free MQTT client apps available) but we can also test it on our PC or on another EV3:


#!/usr/bin/env python3

import paho.mqtt.client as mqtt

# This is the Subscriber

def on_connect(client, userdata, flags, rc):
  print("Connected with result code "+str(rc))
  client.subscribe("topic/test")

def on_message(client, userdata, msg):
  if msg.payload.decode() == "Hello world!":
    print("Yes!")
    client.disconnect()
    
client = mqtt.Client()
client.connect("THE_IP_ADDRESS_OF_OUR_BROKER",1883,60)

client.on_connect = on_connect
client.on_message = on_message

client.loop_forever()
 
 
Note: the second EV3 (the “Subscriber”) just needs the “paho-mqtt” library, there is no need to install the “mosquitto” daemon.
Note: when the publisher sends a string as payload use decode() as in the example above. When the Publisher sends a number, you can use int(msg.payload) as shown in the next example.

A more practical example

We will use MQTT messages to control the speed of an EV3 motor on port A. We will do this by changing just one motor attribute: duty_cycle_sp so we define a topic for this purpose and susbcribe to it: topic/motor-A/dt
 
 
#!/usr/bin/env python3

import paho.mqtt.client as mqtt
from ev3dev.auto import *

# This is the Subscriber

m = MediumMotor(OUTPUT_A)

def on_connect(client, userdata, flags, rc):
    print("Connected with result code "+str(rc))
    client.subscribe("topic/motor-A/dt")

def on_message(client, userdata, msg):
    if (msg.payload == 'Q'):
      m.stop()
      client.disconnect()
    elif (-100 <= int(msg.payload) <= 100):
      m.duty_cycle_sp=msg.payload

client = mqtt.Client()
client.connect("THE_IP_ADDRESS_OF_OUR_BROKER",1883,60)

client.on_connect = on_connect
client.on_message = on_message

m.run_direct()
m.duty_cycle_sp=0

client.loop_forever()


So whenever a device on our network publishes a message with topic topic/motor-A/dt our Subscriber will receive it and if the payload is a proper integer value it will change the motor speed. It will also stop the motor and quit if the payload is just Q.

Reference Link :
http://www.ev3dev.org/docs/tutorials/sending-and-receiving-messages-with-mqtt/ 

Set of Python 3.0 in Ubuntu 16.04


How To Install Python 3 and Set Up a Local Programming Environment on Ubuntu 16.04

Introduction

This tutorial will get you up and running with a local Python 3 programming environment in Ubuntu 16.04.
Python is a versatile programming language that can be used for many different programming projects. First published in 1991 with a name inspired by the British comedy group Monty Python, the development team wanted to make Python a language that was fun to use. Easy to set up, and written in a relatively straightforward style with immediate feedback on errors, Python is a great choice for beginners and experienced developers alike. Python 3 is the most current version of the language and is considered to be the future of Python.
This tutorial will guide you through installing Python 3 on your local Linux machine and setting up a programming environment via the command line. This tutorial will explicitly cover the installation procedures for Ubuntu 16.04, but the general principles apply to any other distribution of Debian Linux.

Prerequisites

You will need a computer with Ubuntu 16.04 installed, as well as have administrative access to that machine and an internet connection.

Step 1 — Setting Up Python 3

We’ll be completing our installation and setup on the command line, which is a non-graphical way to interact with your computer. That is, instead of clicking on buttons, you’ll be typing in text and receiving feedback from your computer through text as well. The command line, also known as a shell, can help you modify and automate many of the tasks you do on a computer every day, and is an essential tool for software developers. There are many terminal commands to learn that can enable you to do more powerful things. The article “An Introduction to the Linux Terminal” can get you better oriented with the terminal.
On Ubuntu 16.04, you can find the Terminal application by clicking on the Ubuntu icon in the upper-left hand corner of your screen and typing “terminal” into the search bar. Click on the Terminal application icon to open it. Alternatively, you can hit the CTRL, ALT, and T keys on your keyboard at the same time to open the Terminal application automatically.
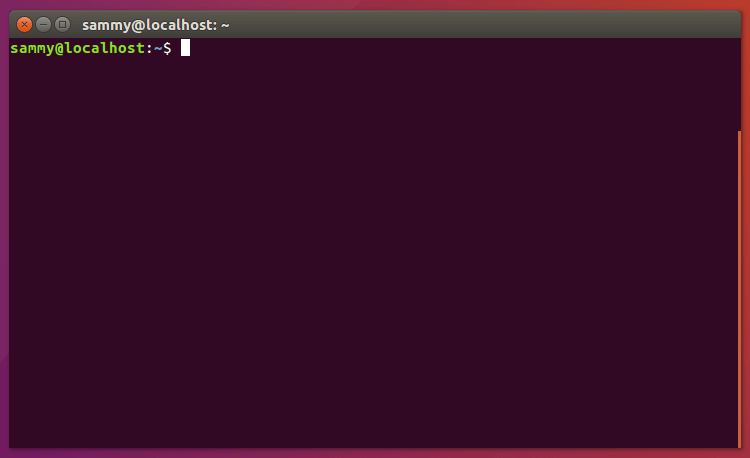
Ubuntu Terminal
Ubuntu 16.04 ships with both Python 3 and Python 2 pre-installed. To make sure that our versions are up-to-date, let’s update and upgrade the system with apt-get:
  • sudo apt-get update
  • sudo apt-get -y upgrade
The -y flag will confirm that we are agreeing for all items to be installed, but depending on your version of Linux, you may need to confirm additional prompts as your system updates and upgrades.
Once the process is complete, we can check the version of Python 3 that is installed in the system by typing:
  • python3 -V
You will receive output in the terminal window that will let you know the version number. The version number may vary, but it will look similar to this:
Output
Python 3.5.2
To manage software packages for Python, let’s install pip:

  • sudo apt-get install -y python3-pip 

    OR

  • sudo apt-get install python-pip
A tool for use with Python, pip installs and manages programming packages we may want to use in our development projects. You can install Python packages by typing:
  • pip3 install package_name
Here, package_name can refer to any Python package or library, such as Django for web development or NumPy for scientific computing. So if you would like to install NumPy, you can do so with the command pip3 install numpy.
There are a few more packages and development tools to install to ensure that we have a robust set-up for our programming environment:
  • sudo apt-get install build-essential libssl-dev libffi-dev python-dev
Once Python is set up, and pip and other tools are installed, we can set up a virtual environment for our development projects.

Step 2 — Setting Up a Virtual Environment

Virtual environments enable you to have an isolated space on your computer for Python projects, ensuring that each of your projects can have its own set of dependencies that won’t disrupt any of your other projects.
Setting up a programming environment provides us with greater control over our Python projects and over how different versions of packages are handled. This is especially important when working with third-party packages.
You can set up as many Python programming environments as you want. Each environment is basically a directory or folder in your computer that has a few scripts in it to make it act as an environment.
We need to first install the venv module, part of the standard Python 3 library, so that we can invoke the pyvenv command which will create virtual environments for us. Let’s install venv by typing:
  • sudo apt-get install -y python3-venv
With this installed, we are ready to create environments. Let’s choose which directory we would like to put our Python programming environments in, or we can create a new directory with mkdir, as in:
  • mkdir environments
  • cd environments
Once you are in the directory where you would like the environments to live, you can create an environment by running the following command:
  • pyvenv my_env
Essentially, pyvenv sets up a new directory that contains a few items which we can view with the ls command:
  • ls my_env
Output
bin include lib lib64 pyvenv.cfg share
Together, these files work to make sure that your projects are isolated from the broader context of your local machine, so that system files and project files don’t mix. This is good practice for version control and to ensure that each of your projects has access to the particular packages that it needs. Python Wheels, a built-package format for Python that can speed up your software production by reducing the number of times you need to compile, will be in the Ubuntu 16.04 share directory.
To use this environment, you need to activate it, which you can do by typing the following command that calls the activate script:
  • source my_env/bin/activate
Your prompt will now be prefixed with the name of your environment, in this case it is called my_env. Your prefix may look somewhat different, but the name of your environment in parentheses should be the first thing you see on your line:
This prefix lets us know that the environment my_env is currently active, meaning that when we create programs here they will use only this particular environment’s settings and packages.
Note: Within the virtual environment, you can use the command python instead of python3, and pip instead of pip3 if you would prefer. If you use Python 3 on your machine outside of an environment, you will need to use the python3 and pip3 commands exclusively.
After following these steps, your virtual environment is ready to use.

Step 3 — Creating a Simple Program

Now that we have our virtual environment set up, let’s create a simple “Hello, World!” program. This will make sure that our environment is working and gives us the opportunity to become more familiar with Python if we aren’t already.
To do this, we’ll open up a command-line text editor such as nano and create a new file:
  • nano hello.py
Once the text file opens up in the terminal window we’ll type out our program:
print("Hello, World!")
Exit nano by typing the control and x keys, and when prompted to save the file press y.
Once you exit out of nano and return to your shell, let’s run the program:
  • python hello.py
The hello.py program that you just created should cause your terminal to produce the following output:
Output
Hello, World!
To leave the environment, simply type the command deactivate and you will return to your original directory.

Conclusion

Congratulations! At this point you have a Python 3 programming environment set up on your local Ubuntu machine and can begin a coding project!
To set up Python 3 on another computer, follow the local programming environment guides for Debian 8, CentOS 7, Windows 10, or macOS.
With your local machine ready for software development, you can continue to learn more about coding in Python by following “Understanding Data Types in Python 3” and “How To Use Variables in Python 3”.

Reference Link:
https://www.digitalocean.com/community/tutorials/how-to-install-python-3-and-set-up-a-local-programming-environment-on-ubuntu-16-04

Sunday, 22 January 2017

How to install and run ns2 in Ubuntu in simplest Way


Installing Network Simulator 2 (NS2) on Ubuntu 14.04

1 Introduction

Network simulators are tools used to simulate discrete events in a network and which helps to predict the behaviours of a computer network. Generally the simulated networks have entities like links, switches, hubs, applications, etc. Once the simulation model is complete, it is executed to analyse the performance. Administrators can then customize the simulator to suit their needs. Network simulators typically come with support for the most popular protocols and networks in use today, such as WLAN,UDP,TCP,IP, WAN, etc.
Most simulators that are available today are based on a GUI application like the NCTUNS while some others incl. NS2 are CLI based. Simulating the network involves configuring the state elements like links, switches, hubs, terminals, etc. and also the events like packet drop rate, delivery status and so on. The most important output of the simulations are the trace files. Trace files log every packet, every event that occurred in the simulation and are used for analysis. Network simulators can also provide other tools to facilitate visual analysis of trends and potential trouble spots. Most of the simulation is performed in discrete time intervals where events that are in the queue are processed one after the other in an order.
Since simulation is a complex task, we cannot guarantee that all the simulators can provide exact or accurate results for all the different type of information. Examples of network simulators are: ns, NCTUNS, NetSim, etc.
ns2 is a name for series of discrete event network simulators like ns-1, ns-2 and ns-3. All of them are discrete-event network simulators, primarily used in research and teaching. ns2 is free software, publicly available under the GNU GPLv2 license for research, development, and use.
This post deals with the installation of "ns2" also called the "network simulator 2" in Ubuntu 14.04.

2 Download and Extract ns2

Download the all in one package for ns2 from here
The package downloaded will be named "ns-allinone-2.35.tar.gz". Copy it to the home folder. Then in a terminal use the following two commands to extract the contents of the package.:
cd ~/
tar -xvzf ns-allinone-2.35.tar.gz
All the files will be extracted into a folder called "ns-allinone-2.35".

3 Building the dependencies

Ns2 requires a few packages to be pre installed. It also requires the GCC- version 4.3 to work correctly. So install all of them by using the following command:
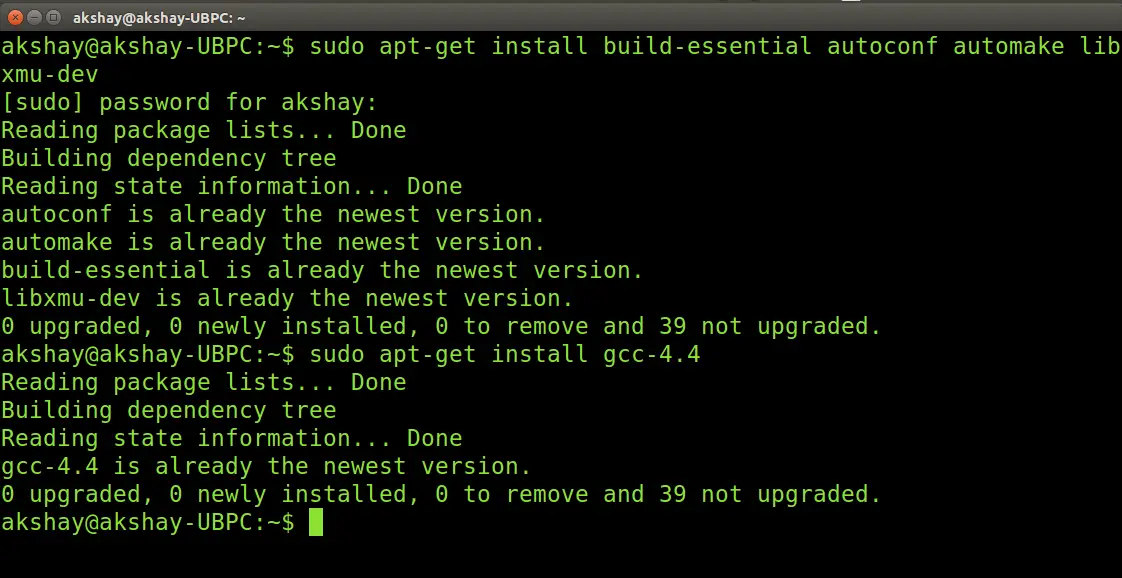
sudo apt-get install build-essential autoconf automake libxmu-dev
One of the dependencies mentioned is the compiler GCC-4.3, which is no longer available, and thus we have to install GCC-4.4 version. The version 4.4 is the oldest we can get. To do that, use the follwoing command:
sudo apt-get install gcc-4.4
The image below shows the output of executing both the above commands. If you have all the dependencies pre-installed, as I did, the output will look like the image below:


Note : 
This very next step is not required in Ubuntu 16.04.
 
Once the installation is over , we have to make a change in the "ls.h" file. Use the following steps to make the changes:
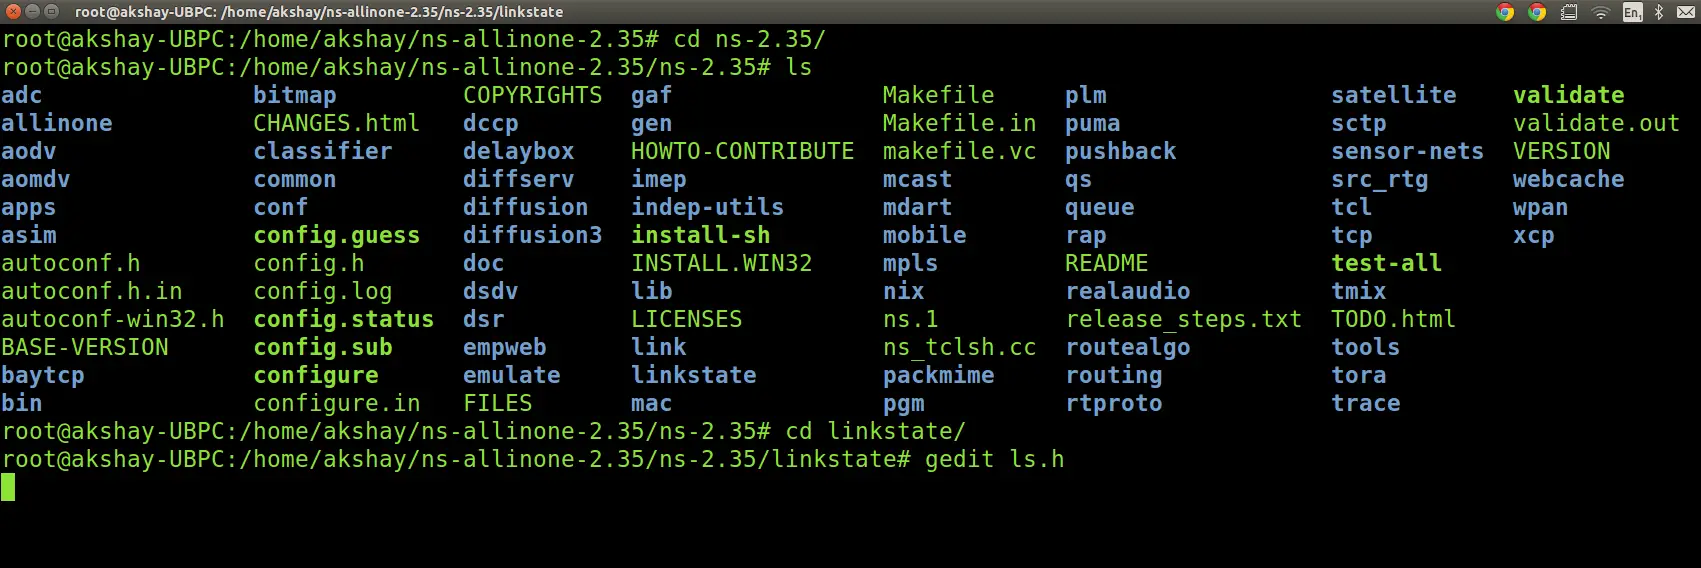
Navigate to the folder "linkstate", use the following command. Here it is assumed that the ns folder extracted is in the home folder of your system.
cd ~/ns-allinone-2.35/ns-2.35/linkstate
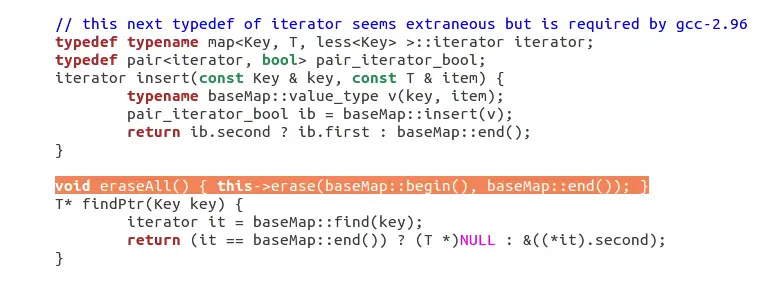
Now open the file named "ls.h" and scroll to the 137th line. In that change the word "error" to "this->error". The image below shows the line 137 (highlighted in the image below) after making the changes to the ls.h file.To open the file use the following command:
gedit ls.h

Save that file and close it.


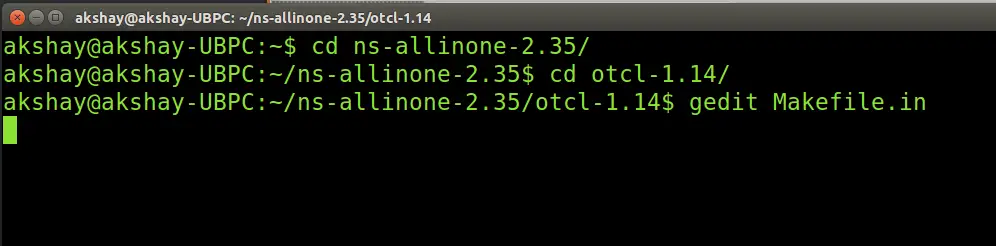
Now there is one more step that has to be done. We have to tell the ns which version of GCC will be used. To do so, go to your ns folder and type the following command:
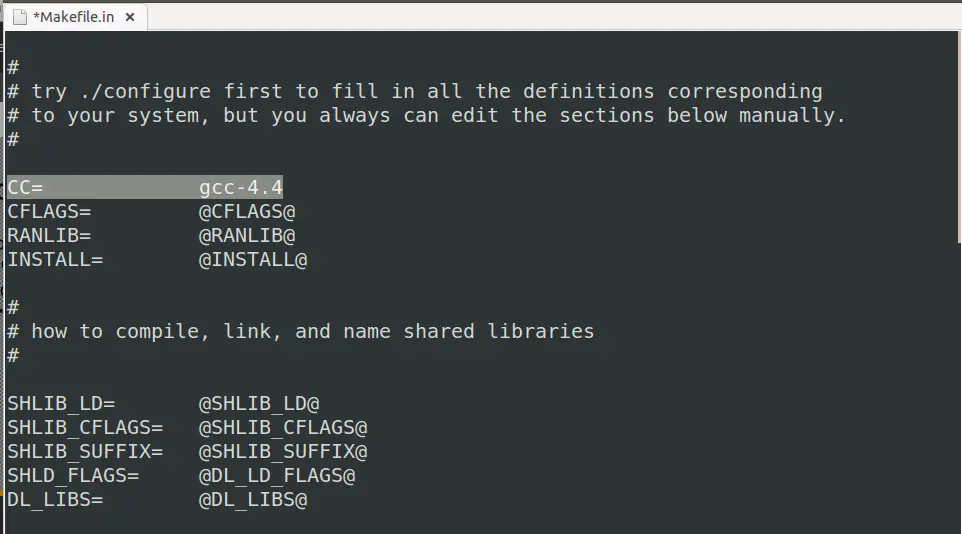
Sudo gedit ns-allinone-2.34/otcl-1.13/Makefile.in


In the file, change Change CC= @CC@ to CC=gcc-4.4, as shown in the image below.


4 Installation

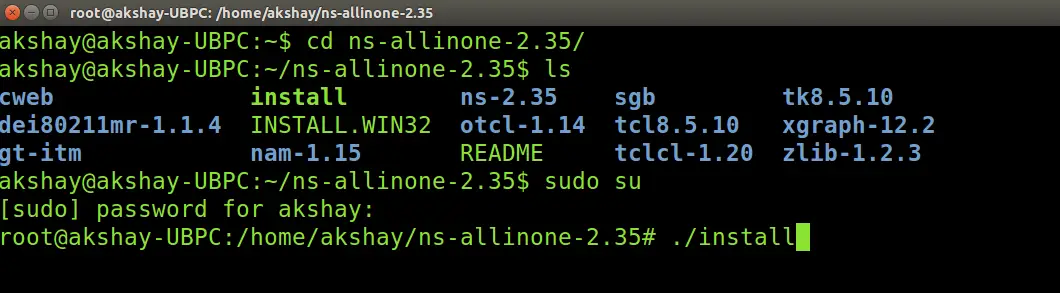
Now we are ready to install ns2. To do so we first require root privileges and then we can run the install script. Use the following two commands:
sudo su cd ~/ns-allinone-2.35/./install
The following is a snap of these commands:

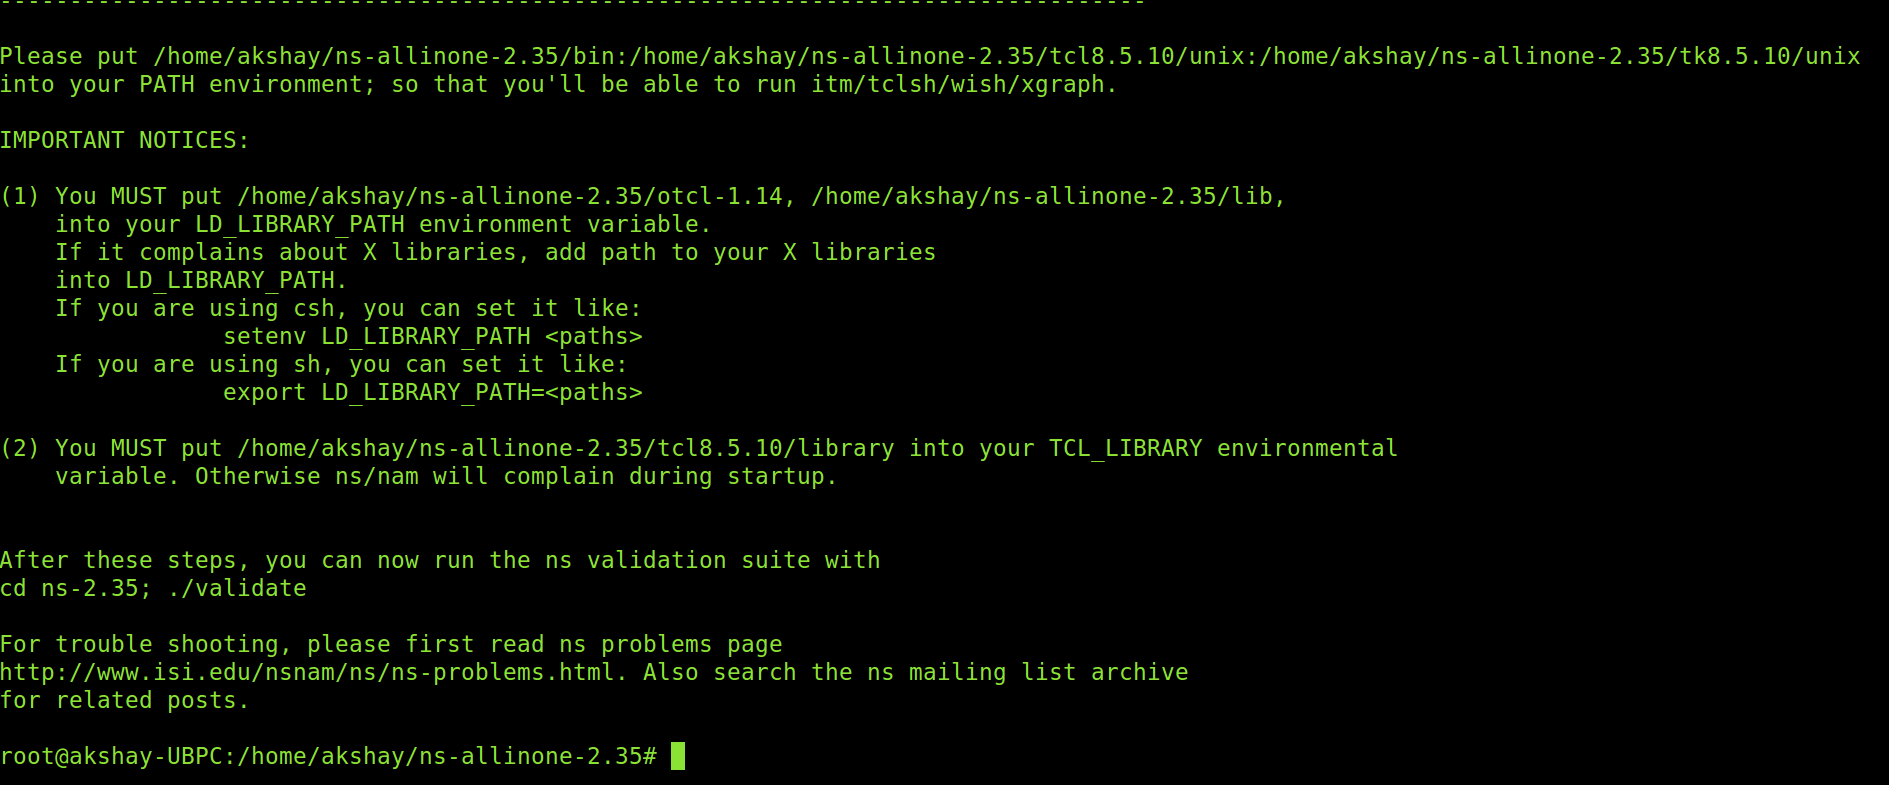
The image below shows how it looks upon successful execution

It took almost 6 minutes to build and install ns2 on my system. But before we run it, we need to add the build path to the environment path.

5 Setting the Environment Path

The final step is to tell the system, where the files for ns2 are installed or present. To do that, we have to set the environment path using the ".bashrc" file. In that file, we need to add a few lines at the bottom. The things to be added are given below. But for the path indicated below, many of those lines have "/home/system/ns-allinone-2.35/...." , but that is where I have my extracted folder. Make sure you replace them with your path. For example, if you have installed it in a folder "/home/Download", then replace "/home/system/ns-allinone-2.35/otcl-1.14" with "/home/system/ns-allinone-2.35/otcl-1.14".
Do this for all the required lines.

sudo gedit ~/.bashrc
Lines to be added:
# LD_LIBRARY_PATH
OTCL_LIB=/home/system/ns-allinone-2.35/otcl-1.14
NS2_LIB=/home/system/ns-allinone-2.35/lib
X11_LIB=/usr/X11R6/lib
USR_LOCAL_LIB=/usr/local/lib
export LD_LIBRARY_PATH=$LD_LIBRARY_PATH:$OTCL_LIB:$NS2_LIB:$X11_LIB:$USR_LOCAL_LIB
# TCL_LIBRARY
TCL_LIB=/home/system/ns-allinone-2.35/tcl8.5.10/library
USR_LIB=/usr/lib
export TCL_LIBRARY=$TCL_LIB:$USR_LIB
# PATH
XGRAPH=/home/system/ns-allinone-2.35/bin:/home/system/ns-allinone-2.35/tcl8.5.10/unix:/home/akshay/ns-allinone-2.35/tk8.5.10/unix
#the above two lines beginning from xgraph and ending with unix should come on the same line
NS=/home/system/ns-allinone-2.35/ns-2.35/ 
NAM=/home/system/ns-allinone-2.35/nam-1.15/ 
PATH=$PATH:$XGRAPH:$NS:$NAM
 
Once the changes have been made, save the file and restart the system.

6 Running ns2

Once the system has restarted, open a terminal and start ns2 by using the following command:
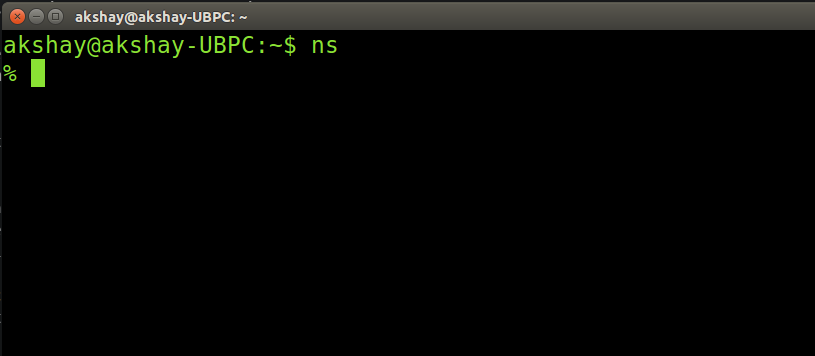
ns
If the installation is correct then the terminal looks like the image below :


Reference Link:
https://www.howtoforge.com/tutorial/ns2-network-simulator-on-ubuntu-14.04/ 

How to install google-chrome in redhat without redhat subscription

Install google-chrome in redhat  Download the .rpm file of chrome https://www.google.com/chrome/thank-you.html?installdataindex=empty&st...