Friday, 10 March 2017


What is AD FS in Windows Azure ?

Active Directory Federation Services
This article begins with a brief overview of Active Directory Federation Services (AD FS), a list of the benefits to using AD FS, and a list of what's new in AD FS for Windows Server 2008. The article then focuses on the code that a managed developer must incorporate into a Web application to make it federation-aware and provides some specific examples on making claims based authorization decisions.
Overview
AD FS is a standards-based service that allows the secure sharing of identity information between trusted business partners (known as a federation) across an extranet. When a user needs to access a Web application from one of its federation partners, the user's own organization is responsible for authenticating the user and providing identity information in the form of "claims" to the partner that hosts the Web application. The hosting partner uses its trust policy to map the incoming claims to claims that are understood by its Web application, which uses the claims to make authorization decisions.
AD FS is Microsoft's implementation of the WS-Federation Passive Requestor Profile protocol (passive indicates that the client requirements are just a cookie- and JavaScript-enabled Web browser). AD FS implements the standards based WS-Federation protocol and Security Assertion Markup Language (SAML).
The AD FS administration tool (adfs.msc) is supplied as a Microsoft Management Console (MMC) snap-in. The administration tool is used to add account and resource partners, map partner claims, add and configure account stores, and identify and configure federation-aware Web applications.
For in-depth discussions of AD FS, see the following articles:
Major Benefits
The following is a brief list of the major benefits to using AD FS:
- Web single sign on (SSO)AD FS provides Web SSO to federated partners outside your organization, which enables their users to have a SSO experience when they access your organization’s Web-based applications.
- Web Services (WS)-* interoperabilityAD FS provides a federated identity management solution that interoperates with other security products that support the WS-* Web Services Architecture. AD FS follows the WS-Federation specification (for passive clients; that is, browsers), which makes it possible for environments that do not use the Windows identity model to federate with Windows environments.
- Partner user account management not requiredThe federated partner's Identity Provider (IP) sends claims that reflect its users' identity, groups, and attribute data. Therefore, your organization no longer needs to revoke, change, or reset the credentials for the partner's users, since the credentials are managed by the partner organization. Additionally, if a partnership needs to be terminated, it can be performed with a single trust policy change. Without AD FS, individual accounts for each partner user would need to be deactivated.
- Claim mappingClaims are defined in terms that each partner understands and appropriately mapped in the AD FS trust policy for exchange between federation partners.
- Centralized federated partner managementAll federated partner management is performed using the AD FS Microsoft Management Console (MMC) snap-in.
- Extensible architectureAD FS provides an extensible architecture for claim augmentation, for example, adding or modifying claims using custom business logic during claims processing. Organizations can use this extensibility to modify AD FS to finely support their business policies.
New and Improved Features
AD FS was first released in Windows Server 2003 R2. It has been updated with the following new and improved features for Windows Server 2008:
- Improved support for Microsoft Office SharePoint® Services 2007 as a claims-aware application
- Support for Active Directory Rights Management Services (AD RMS)External users attempting to access an organization's protected content are authenticated through AD FS. Once these external users are authenticated, AD RMS policies are enforced, and AD RMS will automatically provide the external user with appropriate content licenses to work with an organization's protected content. Administrators have granular control over how these external users interact with an organization's content and can also define templates to apply to multiple partner relationships. Federated AD RMS in Windows Server 2008 is fully compatible with existing Office SharePoint Server 2007 deployments and fully supports down-level AD RMS clients.
- Group Policy control of AD FS deploymentIn previous versions of AD FS, there was no way to limit who deployed an AD FS server in the enterprise. Administrators now have the ability to control and stage the rollout of AD FS servers by limiting deployment through Group Policy.
- Improved installationAD FS is included as a server role and is installed using Server Manager, which automatically lists and installs all the services required by AD FS during installation. A configuration wizard is available to perform server validation checks during the AD FS installation. This feature not only makes installation easier, but also gives AD FS the same consistent install experience as other Windows components.
- Improved import and export of trust policy during federated trust establishmentThis improvement simplifies the process for bringing federation partners on board.
- Events and Microsoft Operations Manager (MOM) alertsPrevious versions of AD FS lacked the ability to easily determine when certificates were going to expire. New events and MOM alerts allow IT administrators to be proactive instead of reactive in managing the certificates, dramatically reducing the possibility of user impact issues.
- AD FS snap-in control of certificate revocation list (CRL) checkingIn previous versions of AD FS, administrators occasionally had to disable CRL checking because partners issued their own certificates that were chained to an Internet authority, but did not publish their CRLs to the internet. CRL checking had to be disabled by manually modifying the trust policy of an XML file. This procedure was not intuitive, difficult to troubleshoot, and the solution was a medium-high risk operation on the AD FS servers. The AD FS snap-in now allows CRL checking behavior (within the scope of AD FS) to be adjusted or disabled.
Tuesday, 21 February 2017

Monday, 20 February 2017
Computer Networking tutorials for GATE people by the GATE people in a very simple language..It will be very helpful to them so,do watch it and share your reviews for the topic and the explanatory..!
If you want to learn any specific topic just mail us on:-
smit.kadvani@gmail.com OR
dhruvan.tanna1@gmail.com
Channel Name: - GATE HACK
LINK : - https://www.youtube.com/channel/UCxikHwpro-DB02ix-NovvtQ

If you want to learn any specific topic just mail us on:-
smit.kadvani@gmail.com OR
dhruvan.tanna1@gmail.com
Channel Name: - GATE HACK
LINK : - https://www.youtube.com/channel/UCxikHwpro-DB02ix-NovvtQ

Saturday, 18 February 2017
How to watch Temperature of CPU cores in Ubuntu ?

How to install sensors library to get temperature of CPU-Cores ?
Install lm-sensors
sudo apt-get install lm-sensors
sudo sensors-detect
sudo service kmod start
sensors in your terminal.sensors
karthick@Ubuntu-desktop:~$ sensors
coretemp-isa-0000
Adapter: ISA adapter
Core 0:      +41.0°C  (high = +78.0°C, crit = +100.0°C)

coretemp-isa-0001
Adapter: ISA adapter
Core 1:      +41.0°C  (high = +78.0°C, crit = +100.0°C)

w83627dhg-isa-0290
Adapter: ISA adapter
Vcore:       +1.10 V  (min =  +0.00 V, max =  +1.74 V)
in1:         +1.60 V  (min =  +1.68 V, max =  +1.44 V)   ALARM
AVCC:        +3.30 V  (min =  +2.98 V, max =  +3.63 V)
VCC:         +3.28 V  (min =  +2.98 V, max =  +3.63 V)
in4:         +1.85 V  (min =  +1.66 V, max =  +1.11 V)   ALARM
in5:         +1.26 V  (min =  +1.72 V, max =  +0.43 V)   ALARM
in6:         +0.09 V  (min =  +1.75 V, max =  +0.62 V)   ALARM
3VSB:        +3.30 V  (min =  +2.98 V, max =  +3.63 V)
Vbat:        +3.18 V  (min =  +2.70 V, max =  +3.30 V)
fan1:          0 RPM  (min = 10546 RPM, div = 128)  ALARM
fan2:        892 RPM  (min = 2136 RPM, div = 8)  ALARM
fan3:          0 RPM  (min = 10546 RPM, div = 128)  ALARM
fan4:          0 RPM  (min = 10546 RPM, div = 128)  ALARM
fan5:          0 RPM  (min = 10546 RPM, div = 128)  ALARM
temp1:       +36.0°C  (high = +63.0°C, hyst = +55.0°C)  sensor = diode
temp2:       +39.5°C  (high = +80.0°C, hyst = +75.0°C)  sensor = diode
temp3:      +119.0°C  (high = +80.0°C, hyst = +75.0°C)  ALARM  sensor = thermistor
cpu0_vid:   +2.050 V
Monday, 13 February 2017
Sending And Receiving Using MQTT

Sending and Receiving Messages with MQTT
Intro
MQTT (Message Queue Telemetry Transport) is an ISO standard (ISO/IEC PRF 20922) publish-subscribe based “light weight” messaging protocol for use on top of the TCP/IP protocol. It is designed for connections with remote locations where a “small code footprint” is required or the network bandwidth is limited.It’s very easy to use the MQTT protocol to exchange small messages between several devices.
Basics
- A
messagehas atopicand apayload, like the subject and the content of an e-mail. - The
Publishersends a message to the network. - The
Subscriberlistens for messages with a particular topic. - The
Brokeris responsible for coordinating the communication between publishers and subscribers. It can also store messages while subscribers are offline (a feature not used in this tutorial).
Requirements
We need a broker that is always available. Just one for the whole network. It can be a PC, a Raspberry Pi or even an EV3. If it is a Debian-based linux system we can usemosquittosudo apt-get install mosquitto
systemctl command:robot@ev3dev:~# systemctl status mosquitto ● mosquitto.service - LSB: mosquitto MQTT v3.1 message broker
Loaded: loaded (/etc/init.d/mosquitto)
Active: active (running) since Wed 2016-05-11 07:40:51 WEST; 7min ago
CGroup: /system.slice/mosquitto.service
└─685 /usr/sbin/mosquitto -c /etc/mosquitto/mosquitto.conf
This tutorial uses python scripts so we need to install the python library paho-mqtt. You need ‘pip3’ to install this module, so if you have not already done so, you will need to install
pip3:sudo apt-get install python3-pip OR sudo apt-get install python-pip
sudo pip3 install paho-mqtt OR sudo pip install paho-mqtt
Publisher example
A very simple script to publish a message:#!/usr/bin/env python3
import paho.mqtt.client as mqtt
# This is the Publisher
client = mqtt.Client()
client.connect("localhost",1883,60)
client.publish("topic/test", "Hello world!");
client.disconnect();
localhost with the IP address of the device
that hosts the broker.Subscriber example
Any MQTT client that is connected to our broker and has subscribed for “topic/test” will receive a MQTT message with “Hello world!” as the payload. We can test it with a mobile phone (there are several free MQTT client apps available) but we can also test it on our PC or on another EV3:#!/usr/bin/env python3
import paho.mqtt.client as mqtt
# This is the Subscriber
def on_connect(client, userdata, flags, rc):
print("Connected with result code "+str(rc))
client.subscribe("topic/test")
def on_message(client, userdata, msg):
if msg.payload.decode() == "Hello world!":
print("Yes!")
client.disconnect()
client = mqtt.Client()
client.connect("THE_IP_ADDRESS_OF_OUR_BROKER",1883,60)
client.on_connect = on_connect
client.on_message = on_message
client.loop_forever()
Note: when the publisher sends a string as payload use
decode() as in the
example above. When the Publisher sends a number, you can use int(msg.payload)
as shown in the next example.A more practical example
We will use MQTT messages to control the speed of an EV3 motor on port A. We will do this by changing just one motor attribute:duty_cycle_sp
so we define a topic for this purpose and susbcribe to it: topic/motor-A/dt #!/usr/bin/env python3
import paho.mqtt.client as mqtt
from ev3dev.auto import *
# This is the Subscriber
m = MediumMotor(OUTPUT_A)
def on_connect(client, userdata, flags, rc):
print("Connected with result code "+str(rc))
client.subscribe("topic/motor-A/dt")
def on_message(client, userdata, msg):
if (msg.payload == 'Q'):
m.stop()
client.disconnect()
elif (-100 <= int(msg.payload) <= 100):
m.duty_cycle_sp=msg.payload
client = mqtt.Client()
client.connect("THE_IP_ADDRESS_OF_OUR_BROKER",1883,60)
client.on_connect = on_connect
client.on_message = on_message
m.run_direct()
m.duty_cycle_sp=0
client.loop_forever()
topic/motor-A/dt
our Subscriber will receive it and if the payload is a proper integer value it will
change the motor speed. It will also stop the motor and quit if the payload is just
Q.Reference Link :
http://www.ev3dev.org/docs/tutorials/sending-and-receiving-messages-with-mqtt/
Set of Python 3.0 in Ubuntu 16.04

How To Install Python 3 and Set Up a Local Programming Environment on Ubuntu 16.04
Introduction
This tutorial will get you up and running with a local Python 3 programming environment in Ubuntu 16.04.Python is a versatile programming language that can be used for many different programming projects. First published in 1991 with a name inspired by the British comedy group Monty Python, the development team wanted to make Python a language that was fun to use. Easy to set up, and written in a relatively straightforward style with immediate feedback on errors, Python is a great choice for beginners and experienced developers alike. Python 3 is the most current version of the language and is considered to be the future of Python.
This tutorial will guide you through installing Python 3 on your local Linux machine and setting up a programming environment via the command line. This tutorial will explicitly cover the installation procedures for Ubuntu 16.04, but the general principles apply to any other distribution of Debian Linux.
Prerequisites
You will need a computer with Ubuntu 16.04 installed, as well as have administrative access to that machine and an internet connection.Step 1 — Setting Up Python 3
We’ll be completing our installation and setup on the command line, which is a non-graphical way to interact with your computer. That is, instead of clicking on buttons, you’ll be typing in text and receiving feedback from your computer through text as well. The command line, also known as a shell, can help you modify and automate many of the tasks you do on a computer every day, and is an essential tool for software developers. There are many terminal commands to learn that can enable you to do more powerful things. The article “An Introduction to the Linux Terminal” can get you better oriented with the terminal.On Ubuntu 16.04, you can find the Terminal application by clicking on the Ubuntu icon in the upper-left hand corner of your screen and typing “terminal” into the search bar. Click on the Terminal application icon to open it. Alternatively, you can hit the
CTRL, ALT, and T keys on your keyboard at the same time to open the Terminal application automatically. 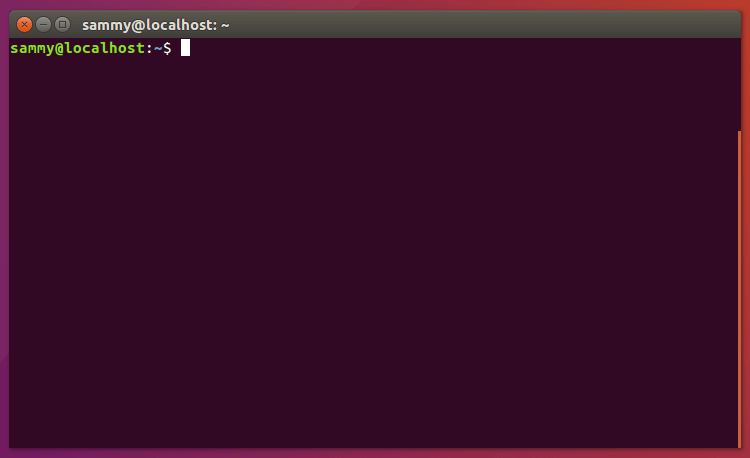
Ubuntu 16.04 ships with both Python 3 and Python 2 pre-installed. To make sure that our versions are up-to-date, let’s update and upgrade the system with
apt-get:
- sudo apt-get update
- sudo apt-get -y upgrade
-y flag will confirm that we are agreeing for all
items to be installed, but depending on your version of Linux, you may
need to confirm additional prompts as your system updates and upgrades. Once the process is complete, we can check the version of Python 3 that is installed in the system by typing:
- python3 -V
Output
Python 3.5.2
A tool for use with Python, pip installs and manages programming packages we may want to use in our development projects. You can install Python packages by typing:
- sudo apt-get install -y python3-pip
OR
sudo apt-get install python-pip
- pip3 install package_name
package_name can
refer to any Python package or library, such as Django for web
development or NumPy for scientific computing. So if you would like to
install NumPy, you can do so with the command pip3 install numpy.There are a few more packages and development tools to install to ensure that we have a robust set-up for our programming environment:
- sudo apt-get install build-essential libssl-dev libffi-dev python-dev
Step 2 — Setting Up a Virtual Environment
Virtual environments enable you to have an isolated space on your computer for Python projects, ensuring that each of your projects can have its own set of dependencies that won’t disrupt any of your other projects.Setting up a programming environment provides us with greater control over our Python projects and over how different versions of packages are handled. This is especially important when working with third-party packages.
You can set up as many Python programming environments as you want. Each environment is basically a directory or folder in your computer that has a few scripts in it to make it act as an environment.
We need to first install the venv module, part of the standard Python 3 library, so that we can invoke the pyvenv command which will create virtual environments for us. Let’s install venv by typing:
- sudo apt-get install -y python3-venv
mkdir, as in:
- mkdir environments
- cd environments
- pyvenv my_env
pyvenv sets up a new directory that contains a few items which we can view with the ls command:
- ls my_env
Output
bin include lib lib64 pyvenv.cfg share
share directory.To use this environment, you need to activate it, which you can do by typing the following command that calls the activate script:
- source my_env/bin/activate
-
Note: Within the virtual environment, you can use the command
python instead of python3, and pip instead of pip3 if you would prefer. If you use Python 3 on your machine outside of an environment, you will need to use the python3 and pip3 commands exclusively. After following these steps, your virtual environment is ready to use.
Step 3 — Creating a Simple Program
Now that we have our virtual environment set up, let’s create a simple “Hello, World!” program. This will make sure that our environment is working and gives us the opportunity to become more familiar with Python if we aren’t already.To do this, we’ll open up a command-line text editor such as nano and create a new file:
- nano hello.py
print("Hello, World!")
control and x keys, and when prompted to save the file press y. Once you exit out of nano and return to your shell, let’s run the program:
- python hello.py
Output
Hello, World!
deactivate and you will return to your original directory. Conclusion
Congratulations! At this point you have a Python 3 programming environment set up on your local Ubuntu machine and can begin a coding project!To set up Python 3 on another computer, follow the local programming environment guides for Debian 8, CentOS 7, Windows 10, or macOS.
With your local machine ready for software development, you can continue to learn more about coding in Python by following “Understanding Data Types in Python 3” and “How To Use Variables in Python 3”.
Reference Link:
https://www.digitalocean.com/community/tutorials/how-to-install-python-3-and-set-up-a-local-programming-environment-on-ubuntu-16-04
Sunday, 22 January 2017
How to install and run ns2 in Ubuntu in simplest Way

Installing Network Simulator 2 (NS2) on Ubuntu 14.04
1 Introduction
Network simulators are tools used to simulate discrete events in a network and which helps to predict the behaviours of a computer network. Generally the simulated networks have entities like links, switches, hubs, applications, etc. Once the simulation model is complete, it is executed to analyse the performance. Administrators can then customize the simulator to suit their needs. Network simulators typically come with support for the most popular protocols and networks in use today, such as WLAN,UDP,TCP,IP, WAN, etc.Since simulation is a complex task, we cannot guarantee that all the simulators can provide exact or accurate results for all the different type of information. Examples of network simulators are: ns, NCTUNS, NetSim, etc.
ns2 is a name for series of discrete event network simulators like ns-1, ns-2 and ns-3. All of them are discrete-event network simulators, primarily used in research and teaching. ns2 is free software, publicly available under the GNU GPLv2 license for research, development, and use.
This post deals with the installation of "ns2" also called the "network simulator 2" in Ubuntu 14.04.
2 Download and Extract ns2
Download the all in one package for ns2 from hereThe package downloaded will be named "ns-allinone-2.35.tar.gz". Copy it to the home folder. Then in a terminal use the following two commands to extract the contents of the package.:
cd ~/
tar -xvzf ns-allinone-2.35.tar.gz
All the files will be extracted into a folder called "ns-allinone-2.35".tar -xvzf ns-allinone-2.35.tar.gz
3 Building the dependencies
Ns2 requires a few packages to be pre installed. It also requires the GCC- version 4.3 to work correctly. So install all of them by using the following command:
sudo apt-get install build-essential autoconf automake libxmu-dev
One of the dependencies mentioned is the compiler GCC-4.3, which is
no longer available, and thus we have to install GCC-4.4 version. The
version 4.4 is the oldest we can get. To do that, use the follwoing
command:
sudo apt-get install gcc-4.4
The image below shows the output of executing both the above
commands. If you have all the dependencies pre-installed, as I did, the
output will look like the image below: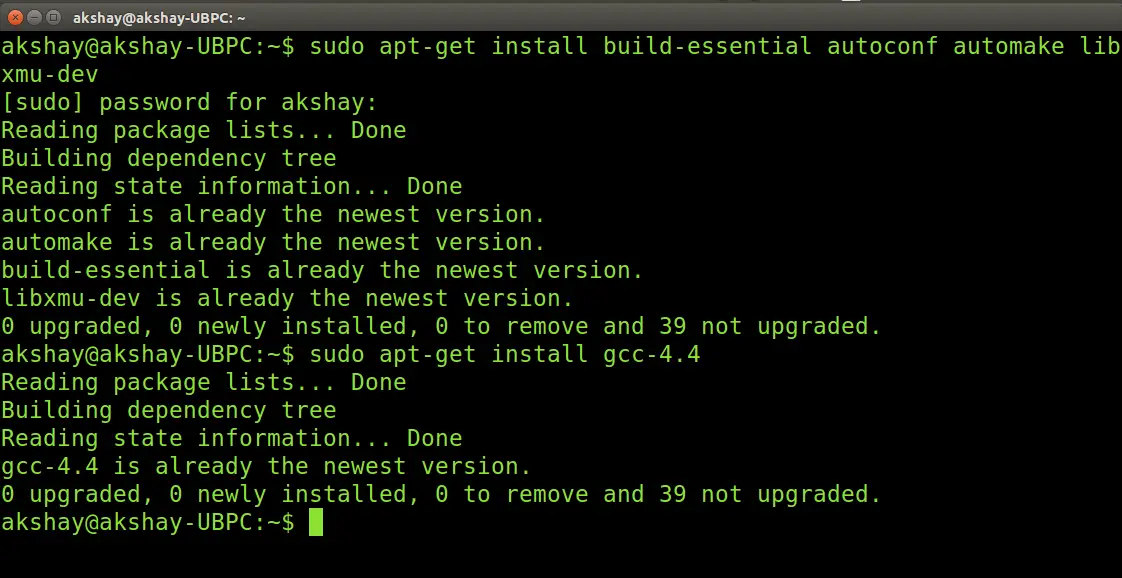
Note :
This very next step is not required in Ubuntu 16.04.
Once the installation is over , we have to make a change in the "ls.h" file. Use the following steps to make the changes:
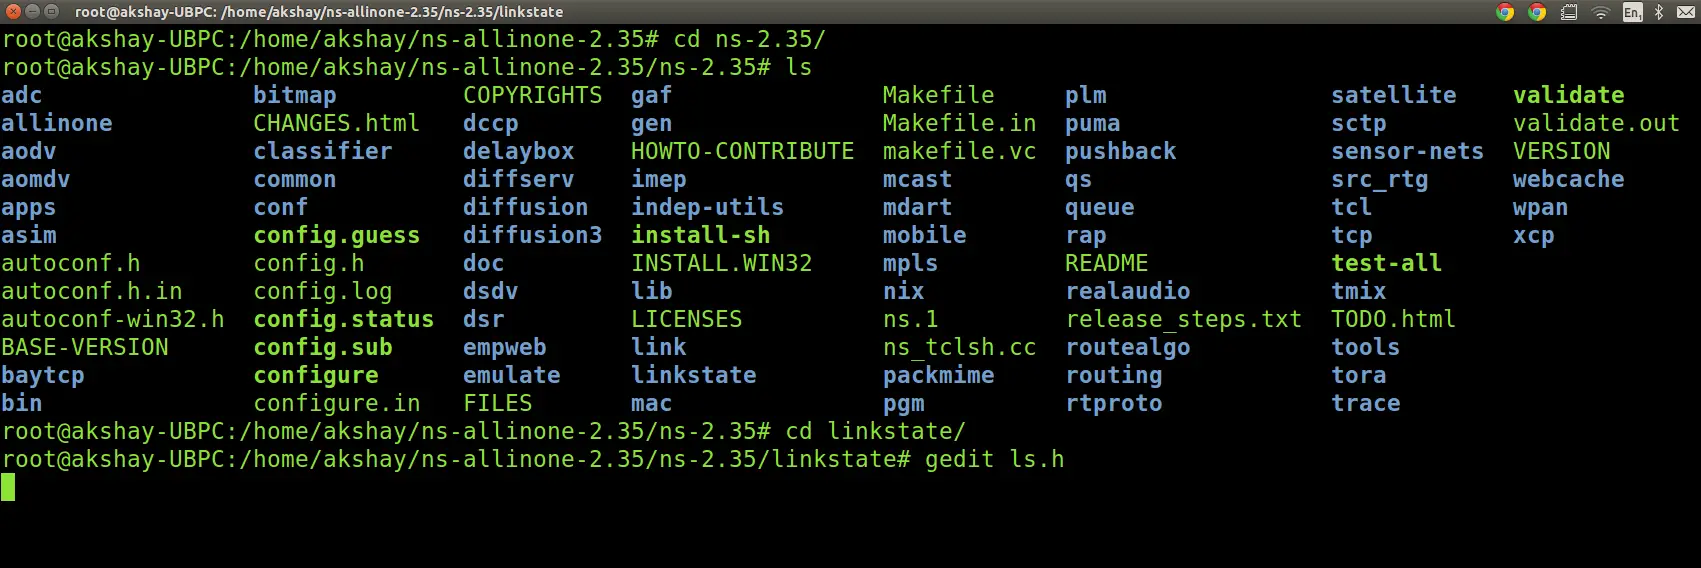
Navigate to the folder "linkstate", use the following command. Here it is assumed that the ns folder extracted is in the home folder of your system.
cd ~/ns-allinone-2.35/ns-2.35/linkstate
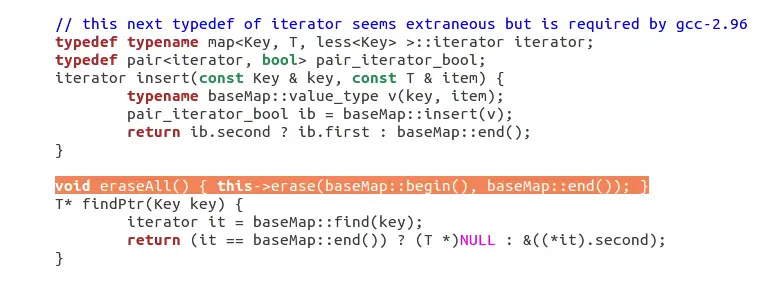
Now open the file named "ls.h" and scroll to the 137th line. In that change the word "error" to "this->error".
The image below shows the line 137 (highlighted in the image below)
after making the changes to the ls.h file.To open the file use the
following command:
gedit ls.h
Save that file and close it.
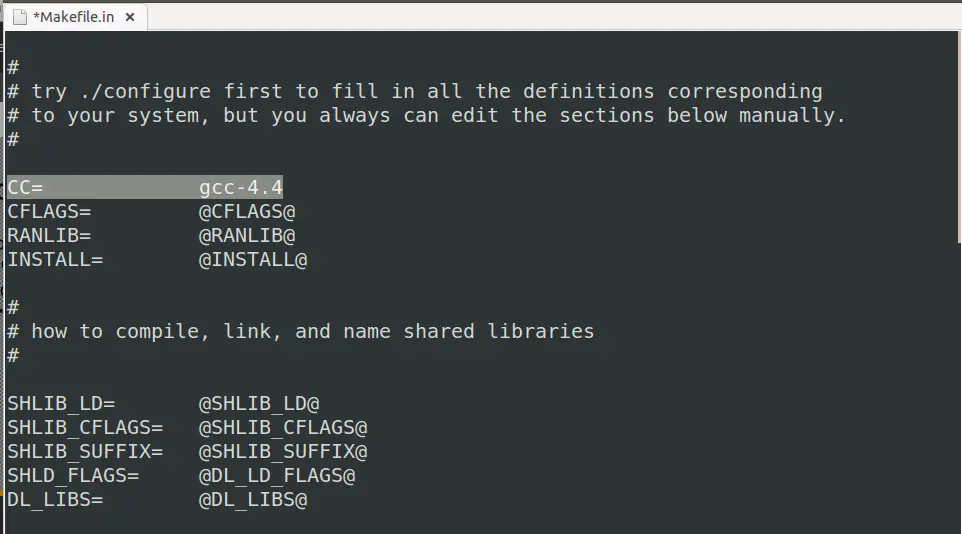
Now there is one more step that has to be done. We have to tell the ns which version of GCC will be used. To do so, go to your ns folder and type the following command:
Sudo gedit ns-allinone-2.34/otcl-1.13/Makefile.in
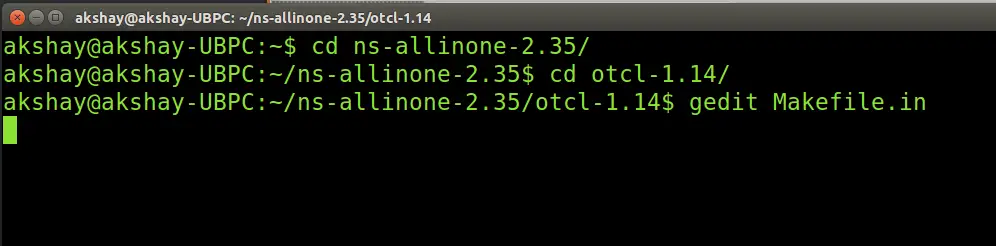
In the file, change Change CC= @CC@ to CC=gcc-4.4, as shown in the image below.
4 Installation
Now we are ready to install ns2. To do so we first require root privileges and then we can run the install script. Use the following two commands:
sudo su cd ~/ns-allinone-2.35/./install
The following is a snap of these commands: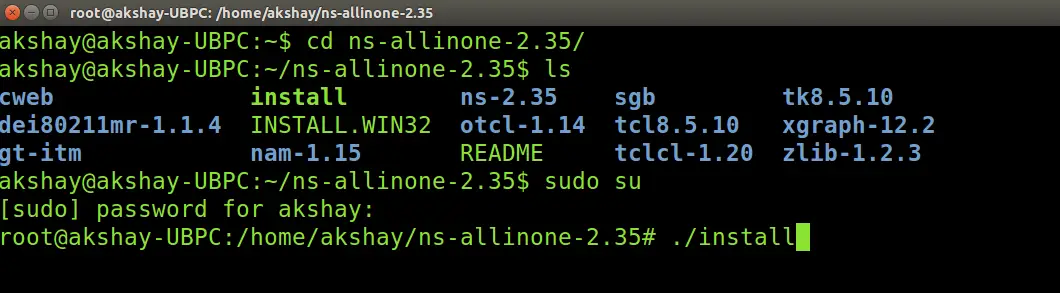
The image below shows how it looks upon successful execution
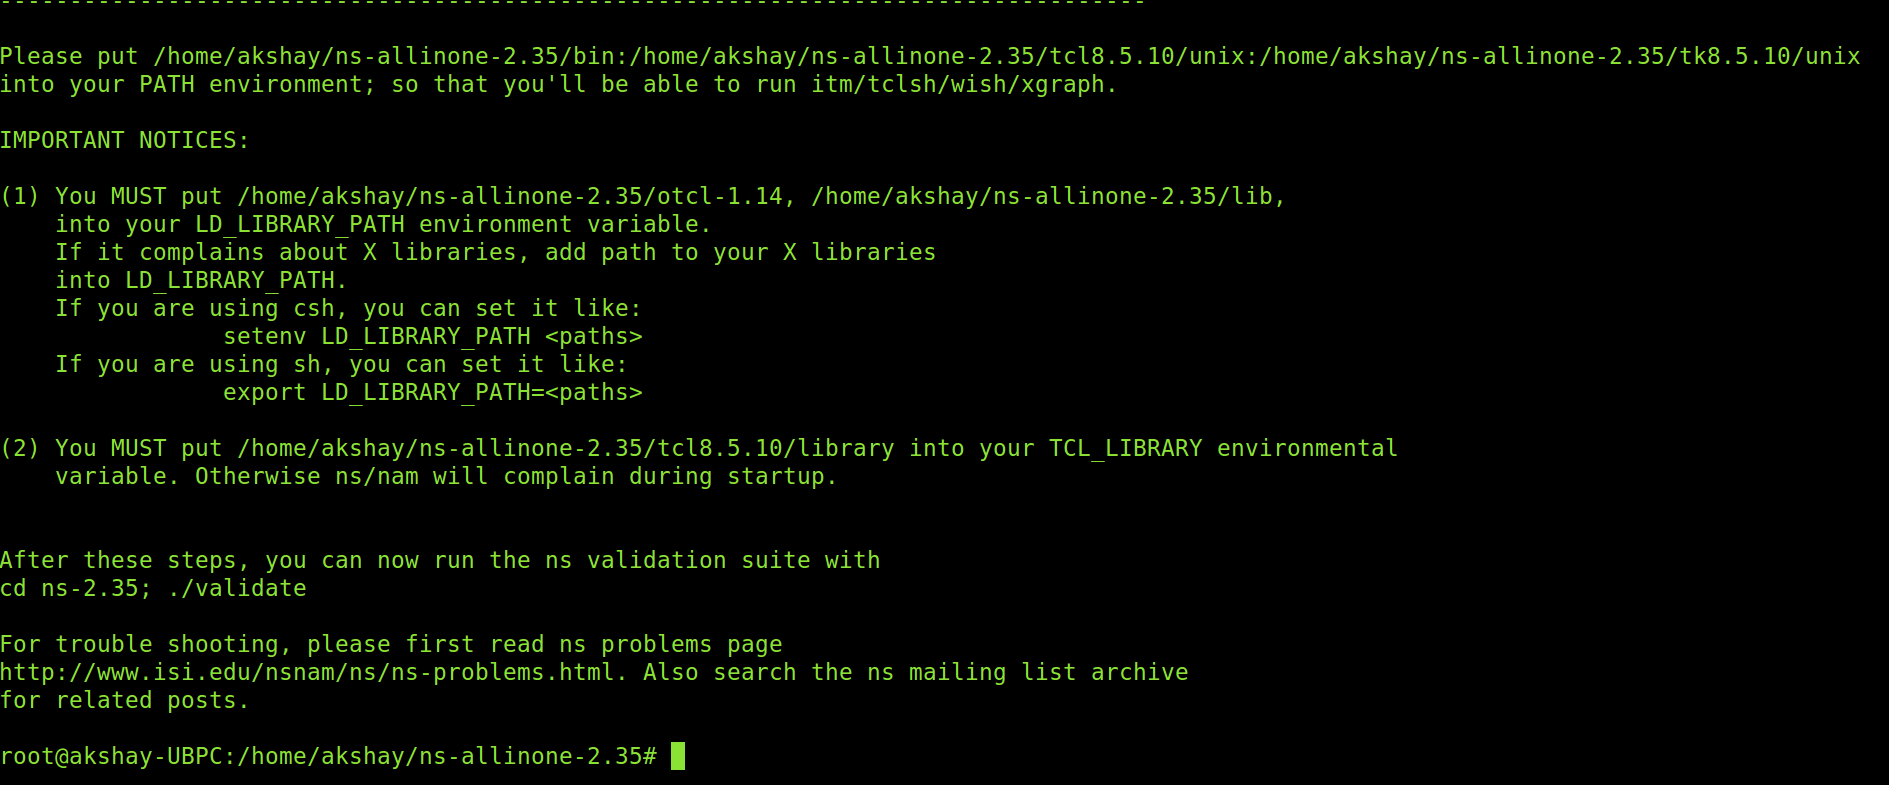
It took almost 6 minutes to build and install ns2 on my system. But before we run it, we need to add the build path to the environment path.
5 Setting the Environment Path
The final step is to tell the system, where the files for ns2 are installed or present. To do that, we have to set the environment path using the ".bashrc" file. In that file, we need to add a few lines at the bottom. The things to be added are given below. But for the path indicated below, many of those lines have "/home/system/ns-allinone-2.35/...." , but that is where I have my extracted folder. Make sure you replace them with your path. For example, if you have installed it in a folder "/home/Download", then replace "/home/system/ns-allinone-2.35/otcl-1.14" with "/home/system/ns-allinone-2.35/otcl-1.14".Do this for all the required lines.
sudo gedit ~/.bashrc
Lines to be added:# LD_LIBRARY_PATH OTCL_LIB=/home/system/ns-allinone-2.35/otcl-1.14 NS2_LIB=/home/system/ns-allinone-2.35/lib X11_LIB=/usr/X11R6/lib USR_LOCAL_LIB=/usr/local/lib export LD_LIBRARY_PATH=$LD_LIBRARY_PATH:$OTCL_LIB:$NS2_LIB:$X11_LIB:$USR_LOCAL_LIB # TCL_LIBRARY TCL_LIB=/home/system/ns-allinone-2.35/tcl8.5.10/library USR_LIB=/usr/lib export TCL_LIBRARY=$TCL_LIB:$USR_LIB # PATH XGRAPH=/home/system/ns-allinone-2.35/bin:/home/system/ns-allinone-2.35/tcl8.5.10/unix:/home/akshay/ns-allinone-2.35/tk8.5.10/unix #the above two lines beginning from xgraph and ending with unix should come on the same line NS=/home/system/ns-allinone-2.35/ns-2.35/ NAM=/home/system/ns-allinone-2.35/nam-1.15/ PATH=$PATH:$XGRAPH:$NS:$NAM
Once the changes have been made, save the file and restart the system.
6 Running ns2
Once the system has restarted, open a terminal and start ns2 by using the following command:
ns
If the installation is correct then the terminal looks like the image below :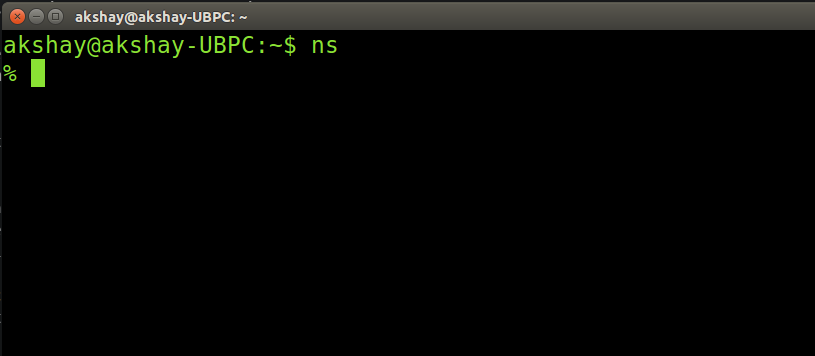
7 Links
Reference Link:
https://www.howtoforge.com/tutorial/ns2-network-simulator-on-ubuntu-14.04/
Wednesday, 18 January 2017
How to create OPENMPI CLUSTER ?

Setting Up an MPICH2 Cluster in Ubuntu
This guide describes how to build a simple MPICH cluster in ubuntu.To understand the guide, a basic knowledge of command line usage and the principle mpich
& clustering is assumed.
Here we have 4 nodes running Ubuntu server with these host names: ub0,ub1,ub2,ub3;
1. Defining hostnames in etc/hosts/
Edit /etc/hosts like these:
127.0.0.1 localhost
192.168.133.100 ub0
192.168.133.101 ub1
192.168.133.102 ub2
192.168.133.103 ub3
Note that the file shouldn't be like this:
127.0.0.1 localhost
127.0.1.1 ub0
192.168.133.100 ub0
192.168.133.101 ub1
192.168.133.102 ub2
192.168.133.103 ub3
or like this:
127.0.0.1 localhost
127.0.1.1 ub0
192.168.133.101 ub1
192.168.133.102 ub2
192.168.133.103 ub3
otherwise other hosts will try to connect to localhost when they try to reach ub0.
2. Installing NFS
NFS allows us to create a folder on the master node and have it synced on all the other nodes.
https://help.ubuntu.com/community/MpichCluster
MpichCluster Community Help Wiki
This folder can be used to store programs. To Install NFS just run this in the master node's
terminal:
omid@ub0:~$ sudo apt‐get install nfs‐server
To install the client program on other nodes run this command on each of them:
omid@ub1:~$ sudo apt‐get install nfs‐client
Note: if you want to be more efficient in controlling several nodes using same
commands, ClusterSSH is a nice tool and you can find a basic twoline tutorial here.
3. Sharing Master Folder
Make a folder in all nodes, we'll store our data and programs in this folder.
omid@ub0:~$ sudo mkdir /mirror
And then we share the contents of this folder located on the master node to all the other
nodes. In order to do this we first edit the /etc/exports file on the master node to contain the
additional line
/mirror *(rw,sync)
This can be done using a text editor such as vim or by issuing this command:
omid@ub0:~$ echo "/mirror *(rw,sync)" | sudo tee ‐a /etc/exports
Now restart the nfs service on the master node to parse this configuration once again.
omid@ub0:~$ sudo service nfs‐kernel‐server restart
Note than we store out data and programs only in master node and other nodes will access
them with NFS.
4. Mounting /master in nodes
Now all we need to do is to mount the folder on the other nodes. This can be done manually
each time like this:
omid@ub1:~$ sudo mount ub0:/mirror /mirror
omid@ub2:~$ sudo mount ub0:/mirror /mirror
omid@ub3:~$ sudo mount ub0:/mirror /mirror
But it's better to change fstab in order to mount it on every boot. We do this by editing
/etc/fstab and adding this line:
ub0:/mirror /mirror nfs
and remounting all partitions by issuing this on all the slave nodes:
omid@ub1:~$ sudo mount ‐a
omid@ub2:~$ sudo mount ‐a
omid@ub3:~$ sudo mount ‐a
5. Defining a user for running MPI programs
We define a user with same name and same userid in all nodes with a home directory in
/mirror.
https://help.ubuntu.com/community/MpichCluster
MpichCluster Community Help Wiki
Here we name it "mpiu"! Also we change the owner of /mirror to mpiu:
omid@ub0:~$ sudo chown mpiu /mirror
6. Installing SSH Server
Run this command in all nodes in order to install OpenSSH Server
omid@ub0:~$ sudo apt get install openssh‐server
‐
7. Setting up passwordless SSH for communication
between nodes
First we login with our new user to the master node:
omid@ub0:~$ su ‐ mpiu
Then we generate an RSA key pair for mpiu:
mpiu@ub0:~$ ssh keygen t rsa
‐
‐
You can keep the default ~/.ssh/id_rsa location. It is suggested to enter a strong passphrase for
security reasons.
Next, we add this key to authorized keys:
mpiu@ub0:~$ cd .ssh
mpiu@ub0:~/.ssh$ cat id_rsa.pub >> authorized_keys
As the home directory of mpiu in all nodes is the same (/mirror/mpiu) , there is no need to run
these commands on all nodes. If you didn't mirror the home directory, though, you can use
ssh‐copy‐id <hostname> to copy a public key to another machine's authorized_keys file
safely.
To test SSH run:
mpiu@ub0:~$ ssh ub1 hostname
If you are asked to enter a passphrase every time, you need to set up a keychain. This is done
easily by installing... Keychain.
mpiu@ub0:~$ sudo apt‐get install keychain
And to tell it where your keys are and to start an sshagent automatically edit your ~/.bashrc
file to contain the following lines (where id_rsa is the name of your private key file):
if type keychain >/dev/null 2>/dev/null; then
keychain ‐‐nogui ‐q id_rsa
[ ‐f ~/.keychain/${HOSTNAME}‐sh ] && . ~/.keychain/${HOSTNAME}‐sh
[ ‐f ~/.keychain/${HOSTNAME}‐sh‐gpg ] && . ~/.keychain/${HOSTNAME}‐sh‐gpg
fi
Exit and login once again or do a source ~/.bashrc for the changes to take effect.
Now your hostname via ssh command should return the other node's hostname without asking
for a password or a passphrase. Check that this works for all the slave nodes.
8. Installing GCC
https://help.ubuntu.com/community/MpichCluster
MpichCluster Community Help Wiki
To be able to compile all the code on our master node (it's sufficient to do it only there if we
do it inside the /mirror folder and all the libraries are in place on other machines) we need a
compiler.
You can get gcc and other necessary stuff by installing the buildessential package:
mpiu@ub0:~$ sudo apt‐get install build‐essential
9.Installing Other Compilers
Other prefered compilers should be installed before installing MPICH.
In this step you may install other compilers such as Inter Fortran, SGI compiler , ...
10. Installing MPICH2
Now the last ingredient we need installed on all the machines is the MPI implementation. You
can install MPICH2 using Synaptic by typing:
sudo apt‐get install mpich2
Alternatively, MPICH2 can be installed from source as explained in the MPICH installer
guide or you can try using some other implementation such as OpenMPI.
To test that the program did indeed install successfully enter this on all the machines:
mpiu@ub0:~$ which mpiexec
mpiu@ub0:~$ which mpirun
11. setting up a machinefile
Create a file called "machinefile" in mpiu's home directory with node names followed by a
colon and a number of processes to spawn:
ub3:4 # this will spawn 4 processes on ub3
ub2:2 # this will spawn 2 processes on ub2
ub1 # this will spawn 1 process on ub1
ub0 # this will spawn 1 process on ub0
11. Testing
Change directory to your mirror folder and write this MPI helloworld program in a file
mpi_hello.c (courtesy of this blog):
#include <stdio.h>
#include <mpi.h>
int main(int argc, char** argv) {
int myrank, nprocs;
MPI_Init(&argc, &argv);
MPI_Comm_size(MPI_COMM_WORLD, &nprocs);
MPI_Comm_rank(MPI_COMM_WORLD, &myrank);
printf("Hello from processor %d of %d\n", myrank, nprocs);
MPI_Finalize();
return 0;
}
https://help.ubuntu.com/community/MpichCluster
MpichCluster Community Help Wiki
Compile it:
mpiu@ub0:~$ mpicc mpi_hello.c ‐o mpi_hello
and run it (the parameter next to n specifies the number of processes to spawn and distribute
among nodes):
mpiu@ub0:~$ mpiexec ‐n 8 ‐f machinefile ./mpi_hello
You should now see output similar to this:
Hello from processor 0 of 8
Hello from processor 1 of 8
Hello from processor 2 of 8
Hello from processor 3 of 8
Hello from processor 4 of 8
Hello from processor 5 of 8
Hello from processor 6 of 8
Hello from processor 7 of 8
Congratulations! You have a working MPI platform
References
For more information visit:
The official MPICH webpage
The official MPICH documentation
SSHing without a key
Using Keychain to store passphrases
A blog post explaining singlenode installation of OpenMPI
MpichCluster (last edited 20150525 20:51:36 by heemayl @
119.30.38.159[119.30.38.159]:heemayl)
https://help.ubuntu.com/community/MpichCluster
5/5
Subscribe to:
Posts (Atom)
-
 How To Install Python 3 and Set Up a Local Programming Environment on Ubuntu 16.04 Introduction This tutorial will get you up an...